Under construction

You've sampled us mid-build.

These guides cover the new ExpiWell platform (v2) and are still being written, checked, and rearranged — pardon the scaffolding: pages may move or change between visits. Still on the legacy app? Its documentation remains on the old support portal.

Open the legacy support portal
Knowledge base  /  From the ExpiWell team

How can we help?

Guides for every step of your study — from your first project to your final data export. The ExpiWell knowledge base for the researcher web platform and the participant mobile app.

102 guides across 29 categories · Updated by the ExpiWell team
Help CenterSet upAccount Settings

Set up a passkey

Set up · Account Settings
Updated September 3, 2026

Passkeys let you verify sign-ins with your device's biometrics — Touch ID, Face ID, or Windows Hello — instead of typing a code. On ExpiWell, passkeys are used as a second factor after your password.

Step by step

  1. Open Settings → Security (under Personal) and scroll to the Passkeys card.
  2. Click Add passkey.
  3. Follow your browser's prompt — it will ask for your device biometric (or device PIN) to register the passkey.
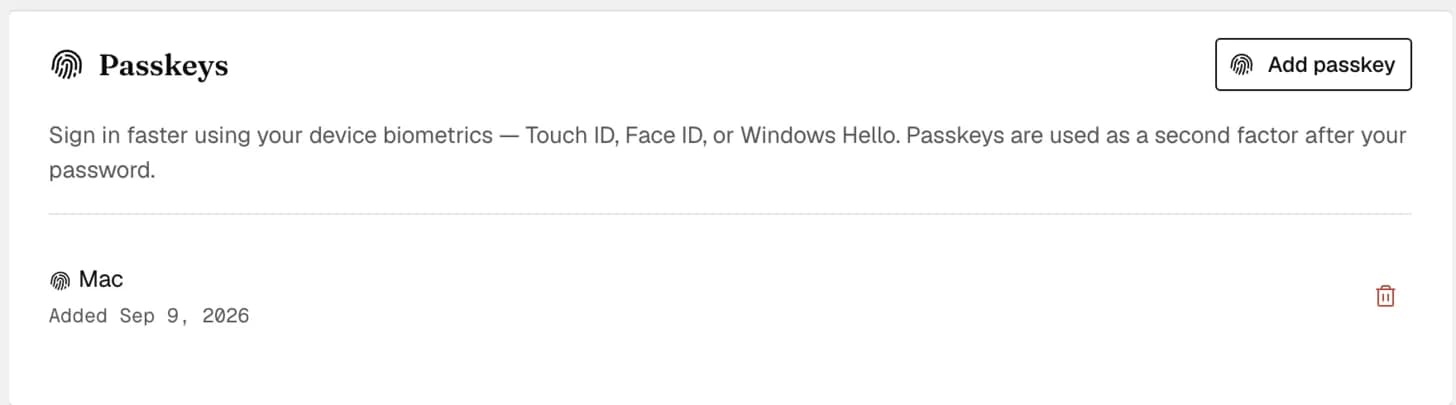
  4. The passkey appears in the list, showing the device it belongs to and the date you added it. You can add more than one.
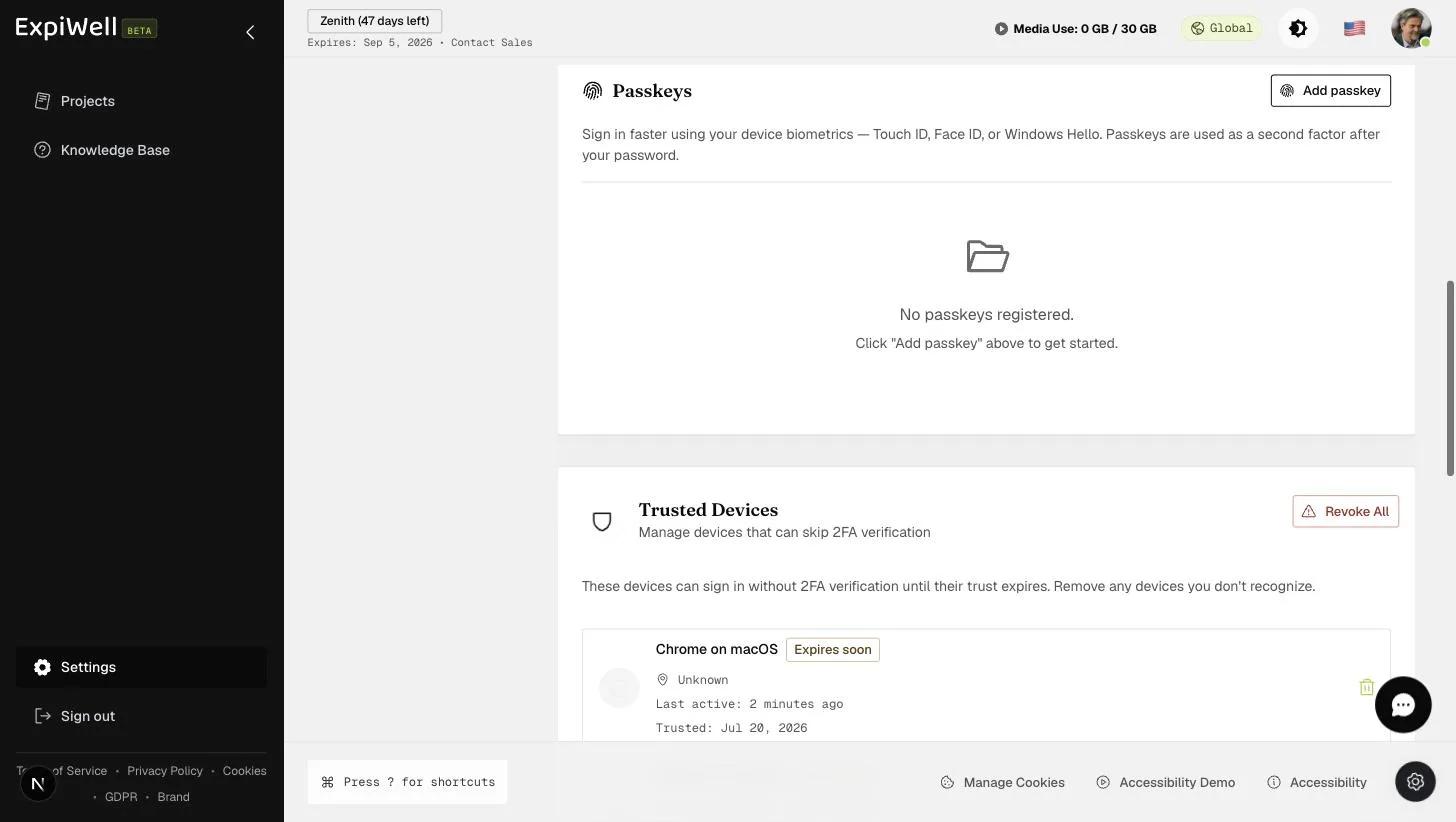
The Passkeys card in Security settings with an Add passkey button, explaining sign-in via Touch ID, Face ID, or Windows Hello, above the Trusted Devices card
The Passkeys card after registration, listing a passkey named Mac with the date it was added and a control to remove it, beside the Add passkey button

Good to know

  • Passkeys complement, not replace, your password — you'll still enter your password first.
  • Combined with Device Trust, a trusted device can skip repeated 2FA checks entirely.

Watch it in action

Was this helpful?
Start today

Talk to a human on the ExpiWell team.

Still stuck? Our team of researchers answers technical and study-design questions alike.