Creating an API credential
Creating a credential
Go to Settings → Developer Hub and choose New credential. The dialog asks five things, and each one narrows what the credential can do.
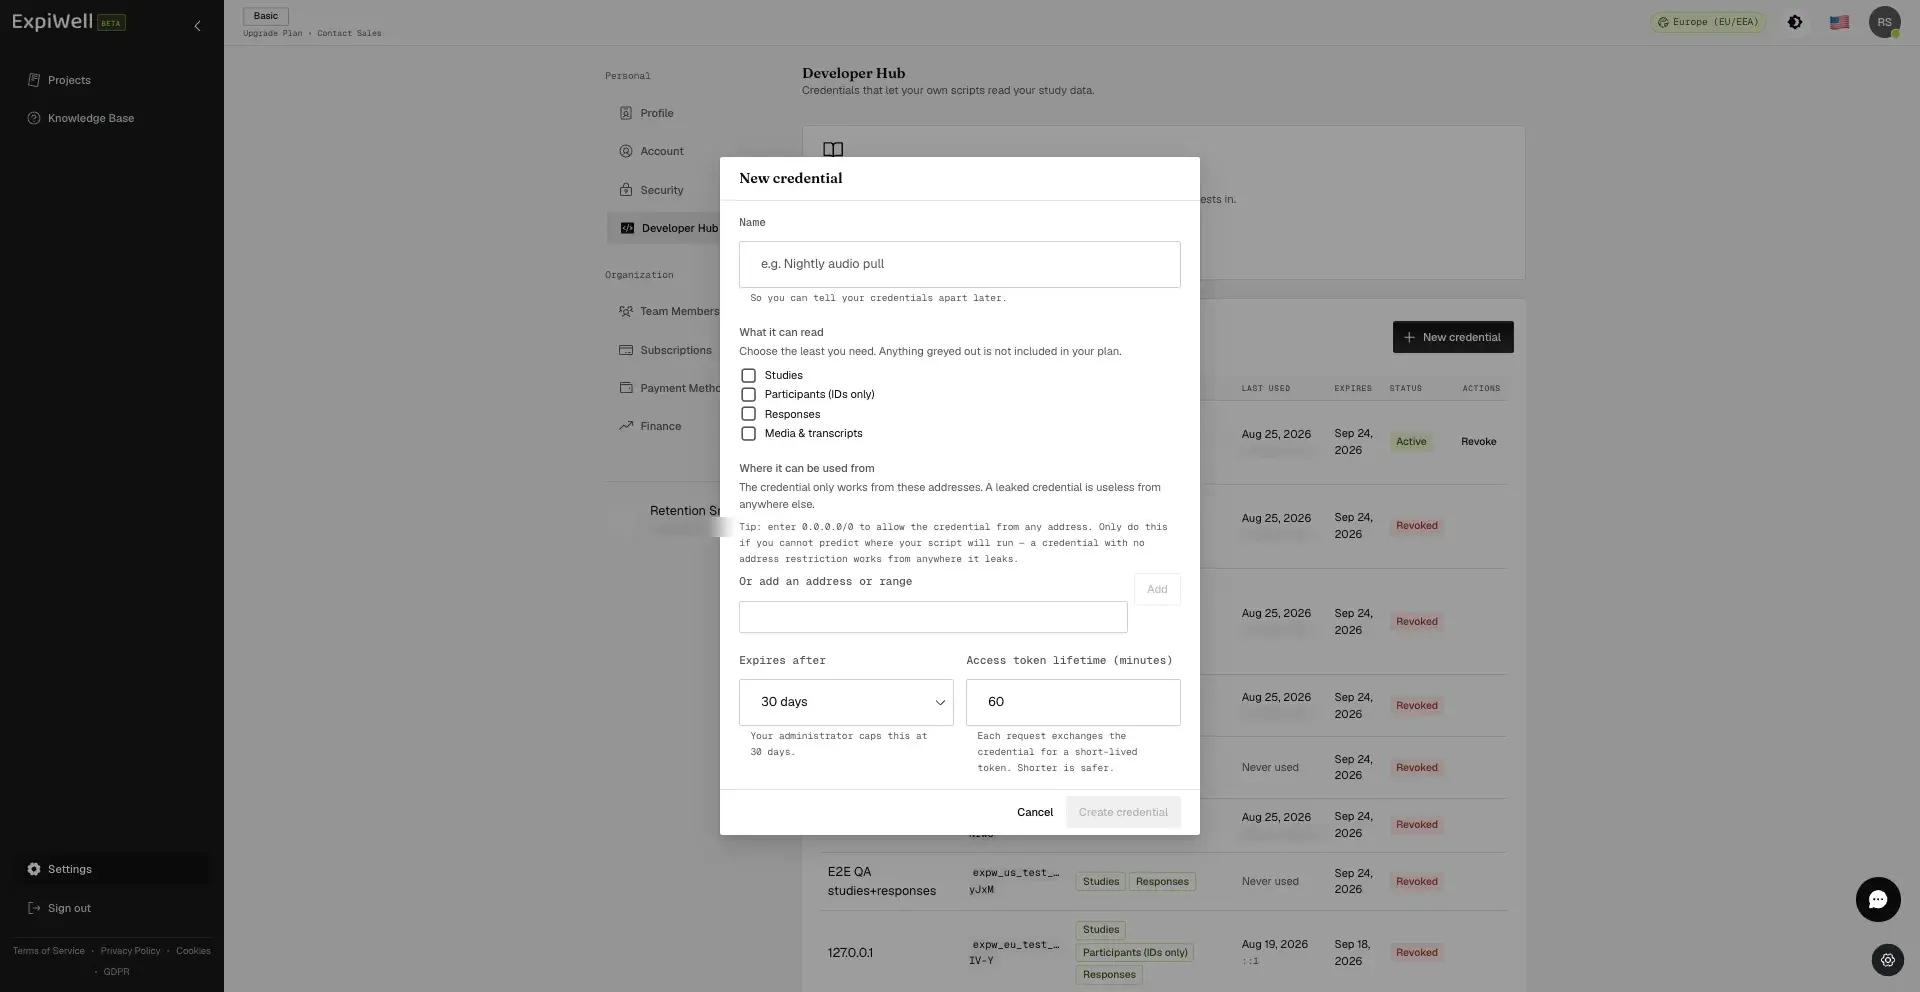
Name it after the script, not the person
The name is only for you. It is how you tell credentials apart later, and how you know which one to revoke when a pipeline is retired. "Nightly warehouse pull" is a good name. "Sarah's key" is a bad one: it stops meaning anything the day Sarah moves teams.
Choose the least you need
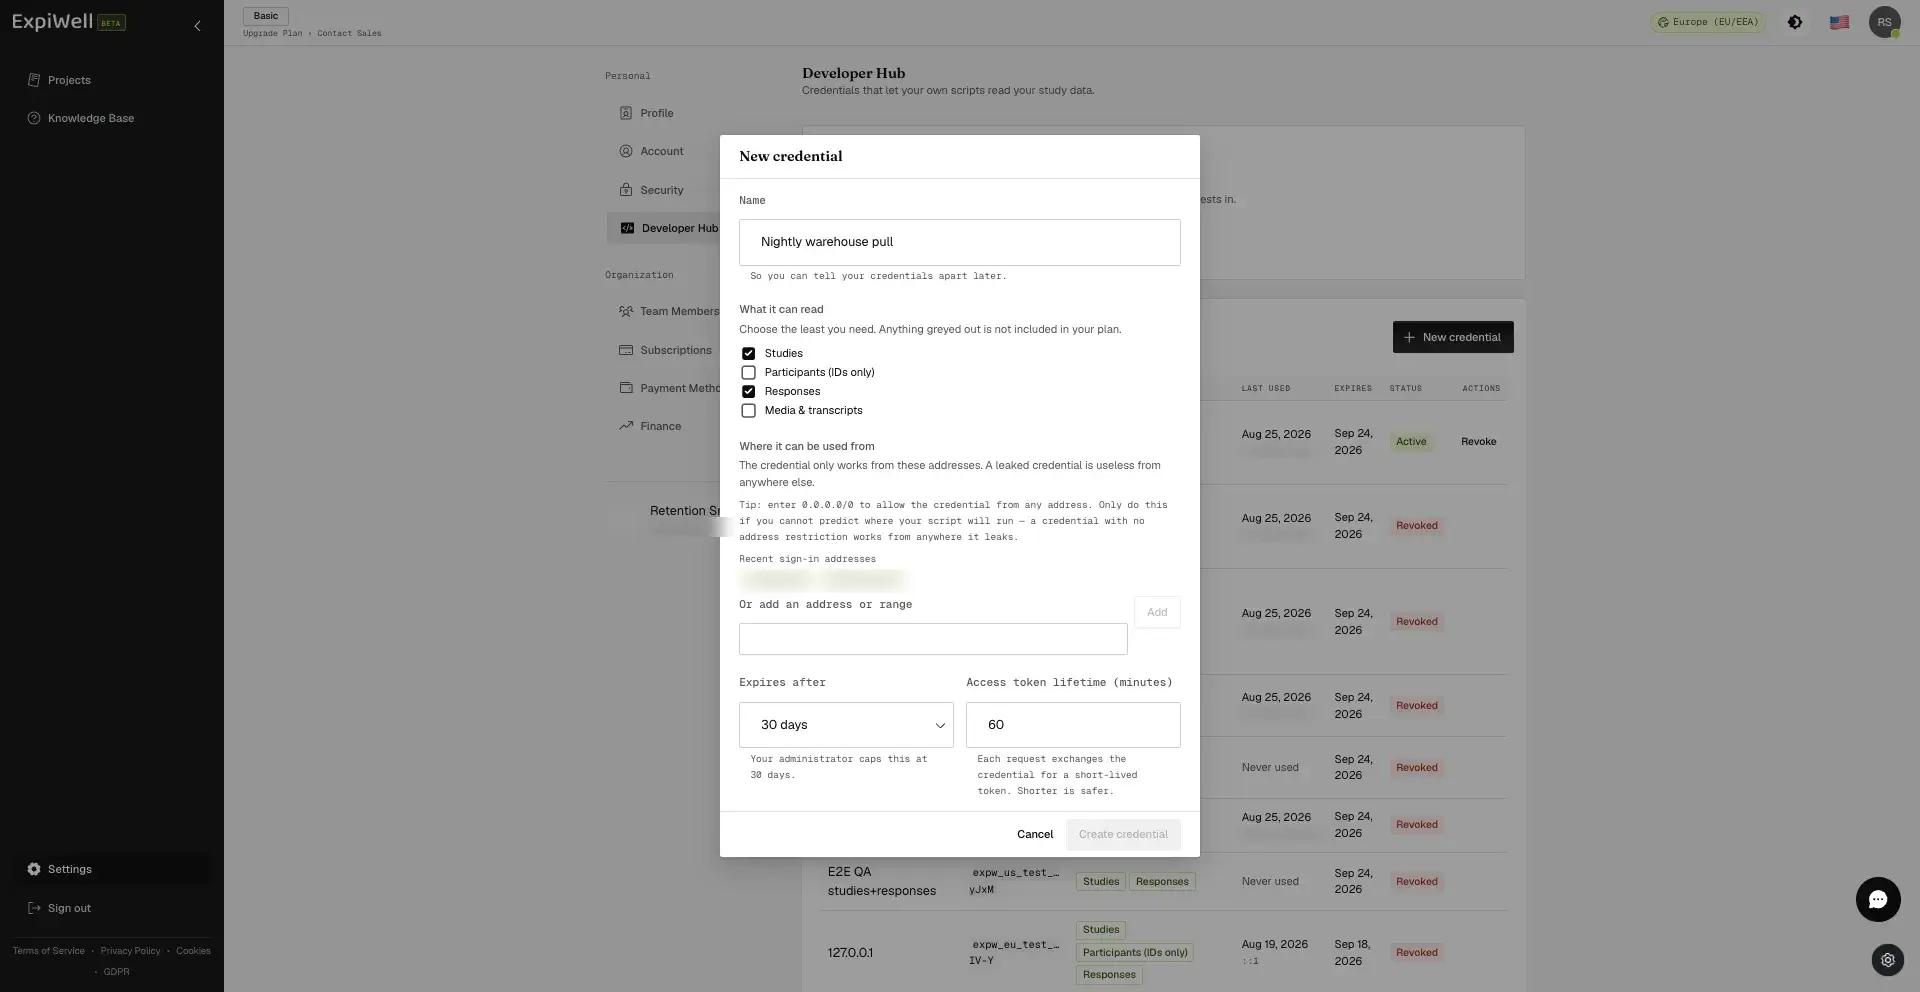
Anything grayed out is not in your account's grant. See Requesting Developer Hub access.
Tick only what the script reads. A dashboard that charts response counts needs Studies and nothing else. Adding Responses because it might be useful later means that if the credential leaks, response content leaks with it.
You can create a second credential with different permissions rather than widening this one. Separate credentials also mean you can revoke one pipeline without stopping the others.
Restrict where it can be used from
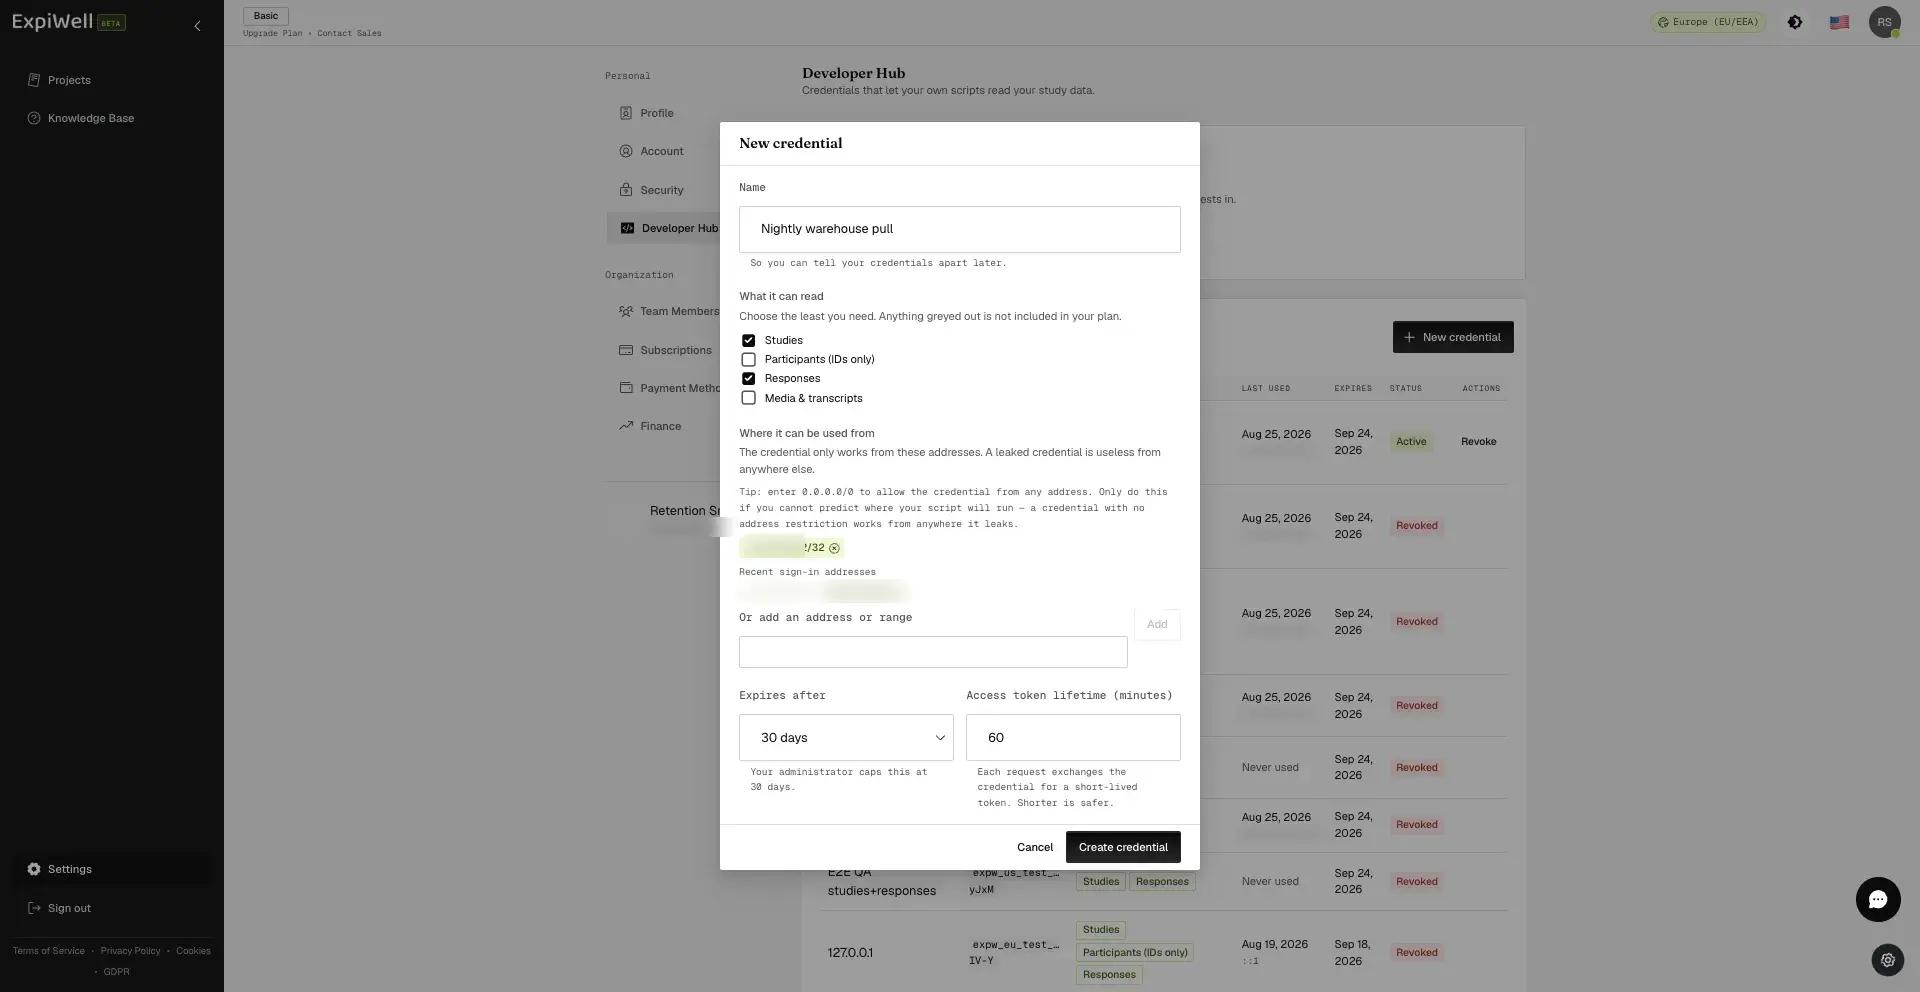
This is the control that makes a leaked credential useless. A credential only works from the addresses listed here, and the check runs on every request, not once at creation.
The dialog offers the addresses you have recently signed in from, which is
usually what you want if the script runs on your own machine. If it runs
somewhere else, such as a server, a scheduler or a CI runner, enter that
address instead. You can type a single address or a CIDR range like
203.0.113.0/24 for a whole office network.
A bare address is stored as a single-host range: type 203.0.113.10 and it is
saved as 203.0.113.10/32.
You may enter 0.0.0.0/0 to allow the credential from any address, and
sometimes there is no alternative, because a rotating cloud egress cannot be
enumerated. Understand the trade: a credential with no address restriction
works from anywhere it leaks, and the allowlist is the one control that does
not depend on the secret staying secret. Prefer a range, however wide, over no
restriction at all.
Set the expiry and token lifetime
Expires after is how long the credential itself lives, capped by your account's grant. When it expires, requests stop and you create a new one.
Access token lifetime is how long each short-lived token lasts, from 10 to 60 minutes. Shorter is safer, because it is the window in which a stolen token still works. Most scheduled jobs finish well inside 10 minutes, and the script re-requests a token on its next run regardless. Leave it at 60 only if a single job genuinely runs for the best part of an hour.
Copy the credential now
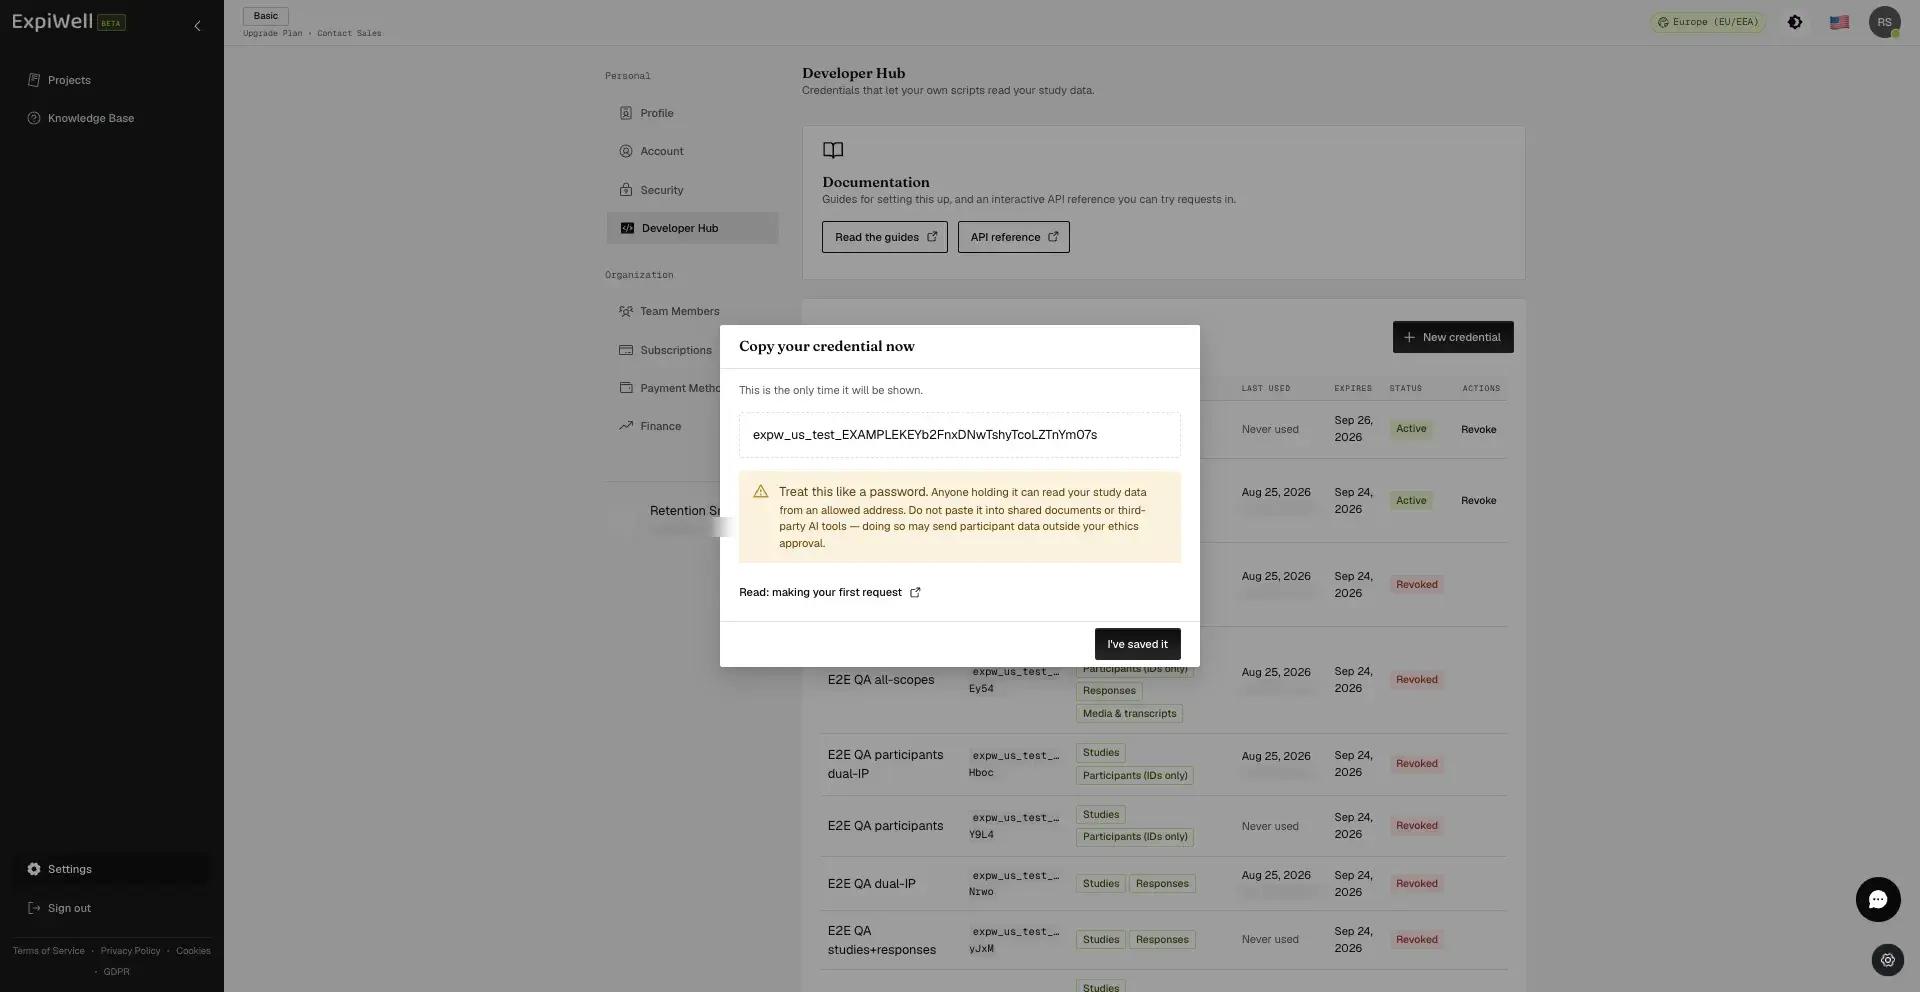
The credential is shown once, and there is no way to retrieve it afterwards. We store only a hash, so we could not show it to you again even if you asked. If you lose it, revoke it and create another.
Put it straight into wherever your script reads secrets from. Do not paste it into a shared document, a ticket, a chat message, or a third-party AI tool. Anything holding it can read your study data from an allowed address, and sending participant data outside your ethics approval is exactly the failure this control exists to prevent.
Reading the credentials list
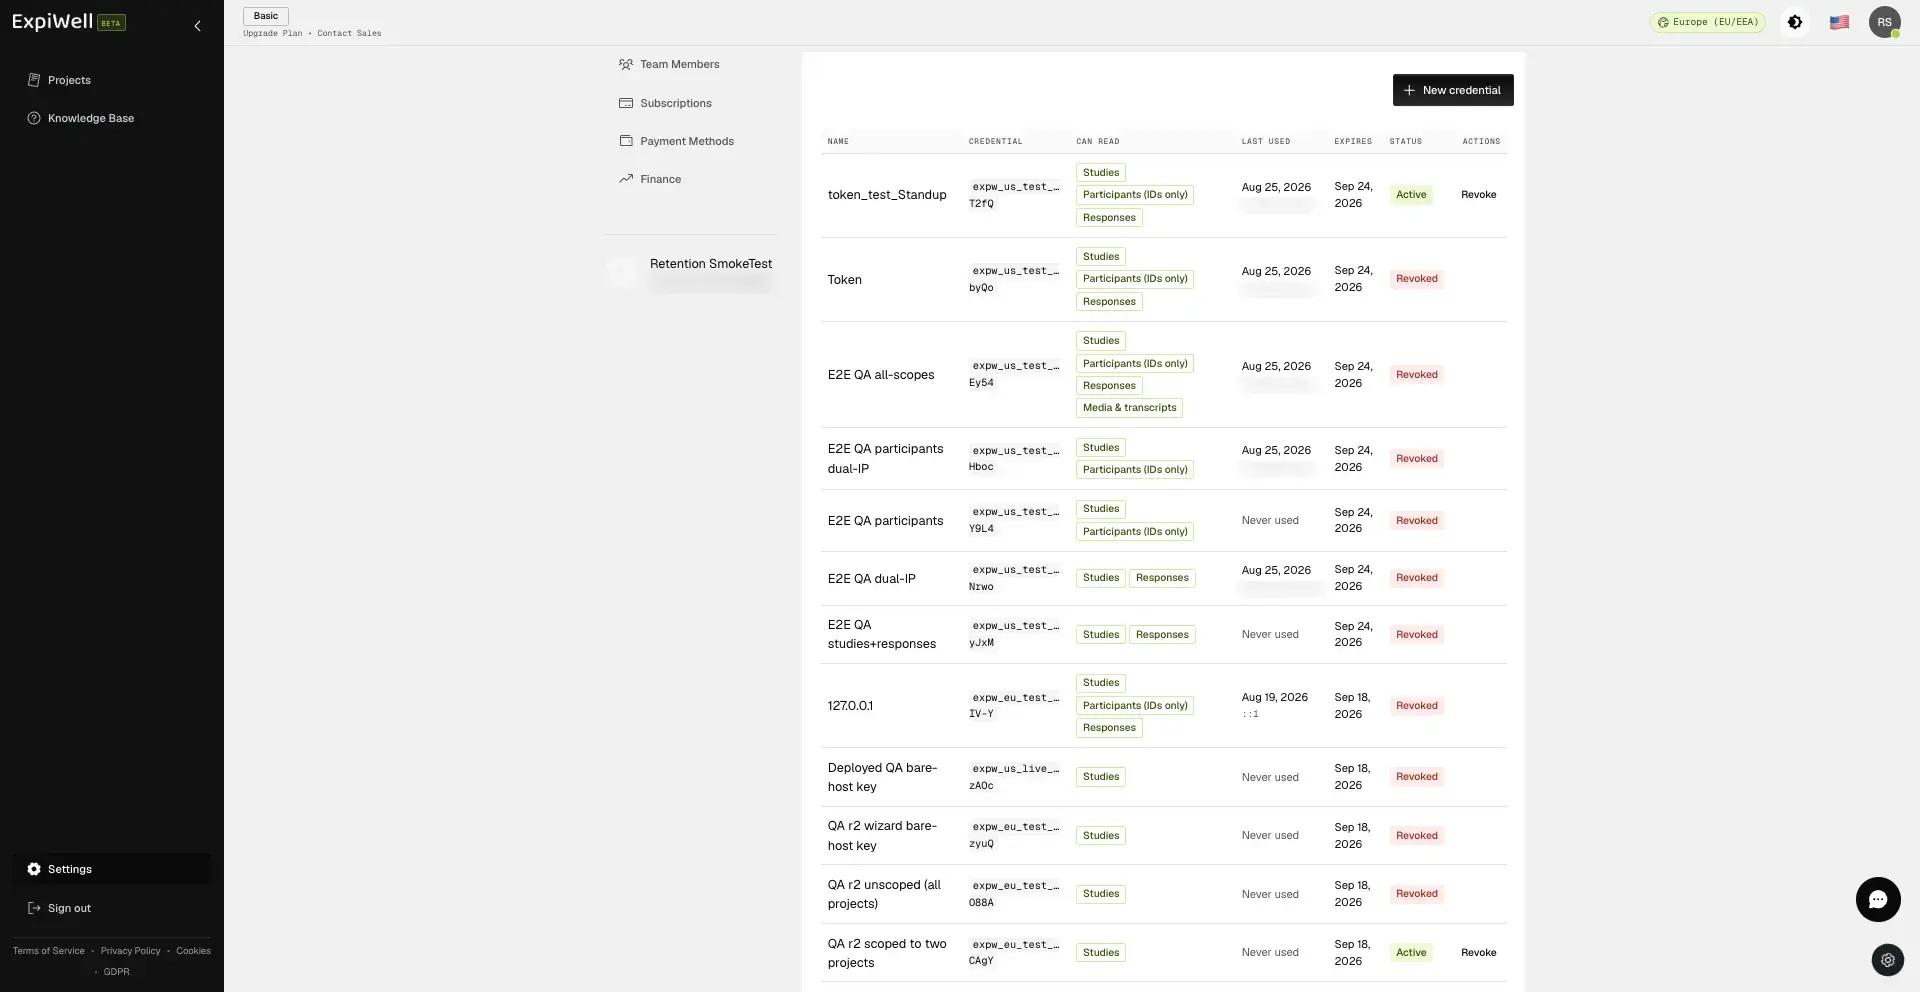
Each row shows the permissions it carries, when it was last used and from which address, when it expires, and whether it is still active. Only the first and last few characters of the credential are shown: enough to tell rows apart, never enough to use.
Last used is worth checking periodically. A credential that has not been used in months is one nobody would notice being abused; revoke it.
Revoking
Choose Revoke on the row. It takes effect immediately, and that includes tokens already issued from it. A script mid-run stops on its next request rather than at the end of the token's hour.
Revoking cannot be undone, and it does not free the credential's name. Revoked credentials stay in the list as a record; they do not count against your credential limit.