בבנייה

דגמתם אותנו באמצע הבנייה.

המדריכים האלה מכסים את פלטפורמת ExpiWell החדשה (v2) ועדיין נכתבים, נבדקים ומאורגנים מחדש — סלחו לנו על הפיגומים: עמודים עשויים לזוז או להשתנות בין ביקור לביקור. עדיין באפליקציה הקודמת? התיעוד שלה נשאר בפורטל התמיכה הישן.

לפורטל התמיכה הישן
מאגר ידע  /  מצוות ExpiWell

איך נוכל לעזור?

מדריכים לכל שלב במחקר — מהפרויקט הראשון ועד ייצוא הנתונים הסופי. מאגר הידע של ExpiWell לפלטפורמת החוקרים באינטרנט ולאפליקציית המשתתפים בנייד.

102 מדריכים ב‑29 קטגוריות · מתעדכן על ידי צוות ExpiWell
Help CenterSet upAccount Settings

Set up a passkey

Set up · Account Settings
Updated 3 בספטמבר 2026

Passkeys let you verify sign-ins with your device's biometrics — Touch ID, Face ID, or Windows Hello — instead of typing a code. On ExpiWell, passkeys are used as a second factor after your password.

Step by step

  1. Open Settings → Security (under Personal) and scroll to the Passkeys card.
  2. Click Add passkey.
  3. Follow your browser's prompt — it will ask for your device biometric (or device PIN) to register the passkey.
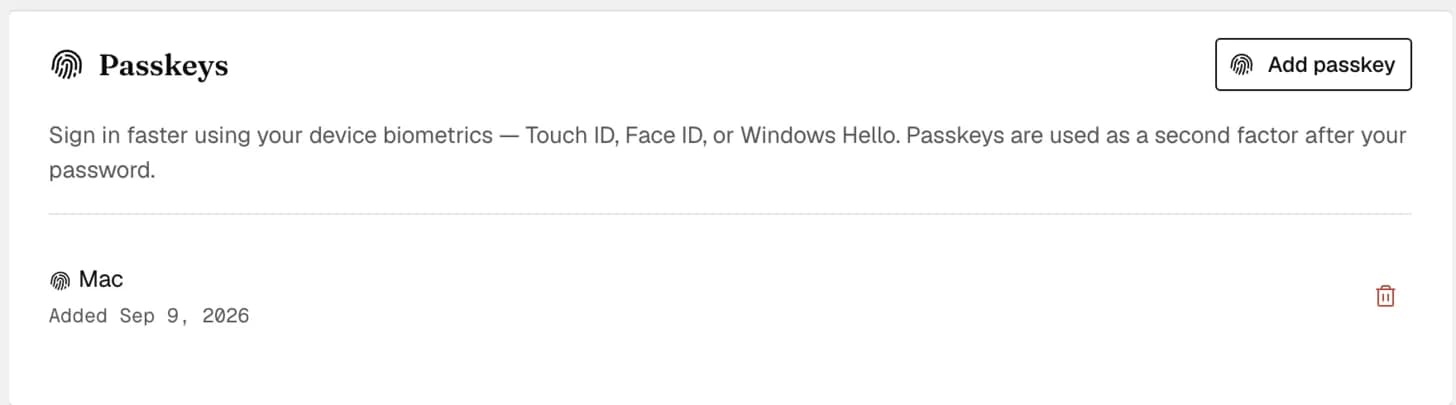
  4. The passkey appears in the list, showing the device it belongs to and the date you added it. You can add more than one.
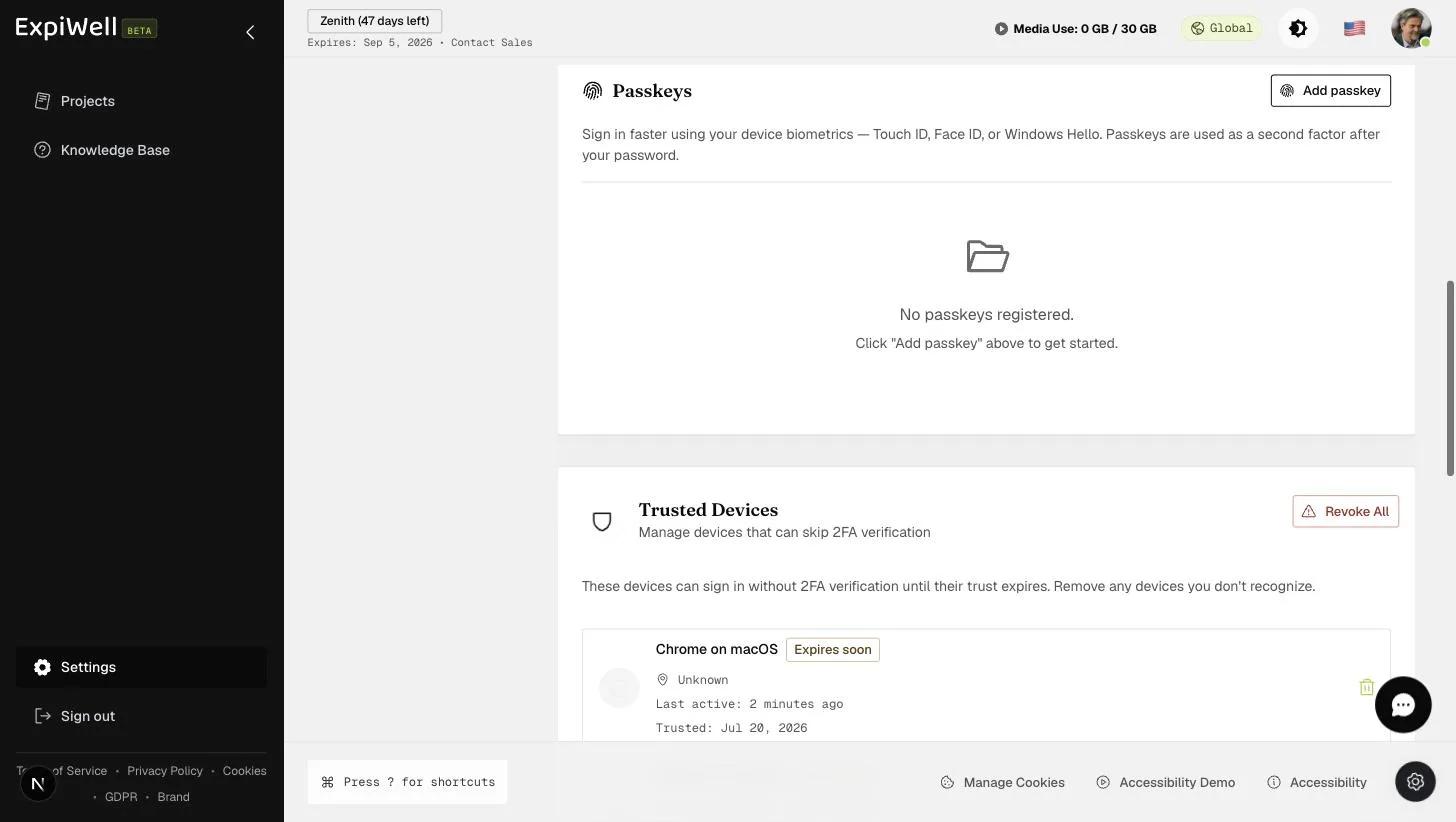
The Passkeys card in Security settings with an Add passkey button, explaining sign-in via Touch ID, Face ID, or Windows Hello, above the Trusted Devices card
The Passkeys card after registration, listing a passkey named Mac with the date it was added and a control to remove it, beside the Add passkey button

Good to know

  • Passkeys complement, not replace, your password — you'll still enter your password first.
  • Combined with Device Trust, a trusted device can skip repeated 2FA checks entirely.

Watch it in action

Was this helpful?
Start today

דברו עם בן אדם מצוות ExpiWell.

עדיין תקועים? צוות החוקרים שלנו עונה גם על שאלות טכניות וגם על שאלות של תכנון מחקר.